Mounting an image
FTK Imager
For this case I'll use a VMware Workstation for Windows and VirtualBox for Linux as a virtualization platforms.
Windows Part
Open FTK Imager and mount the .e01 image as a physical (only) device in Writable mode
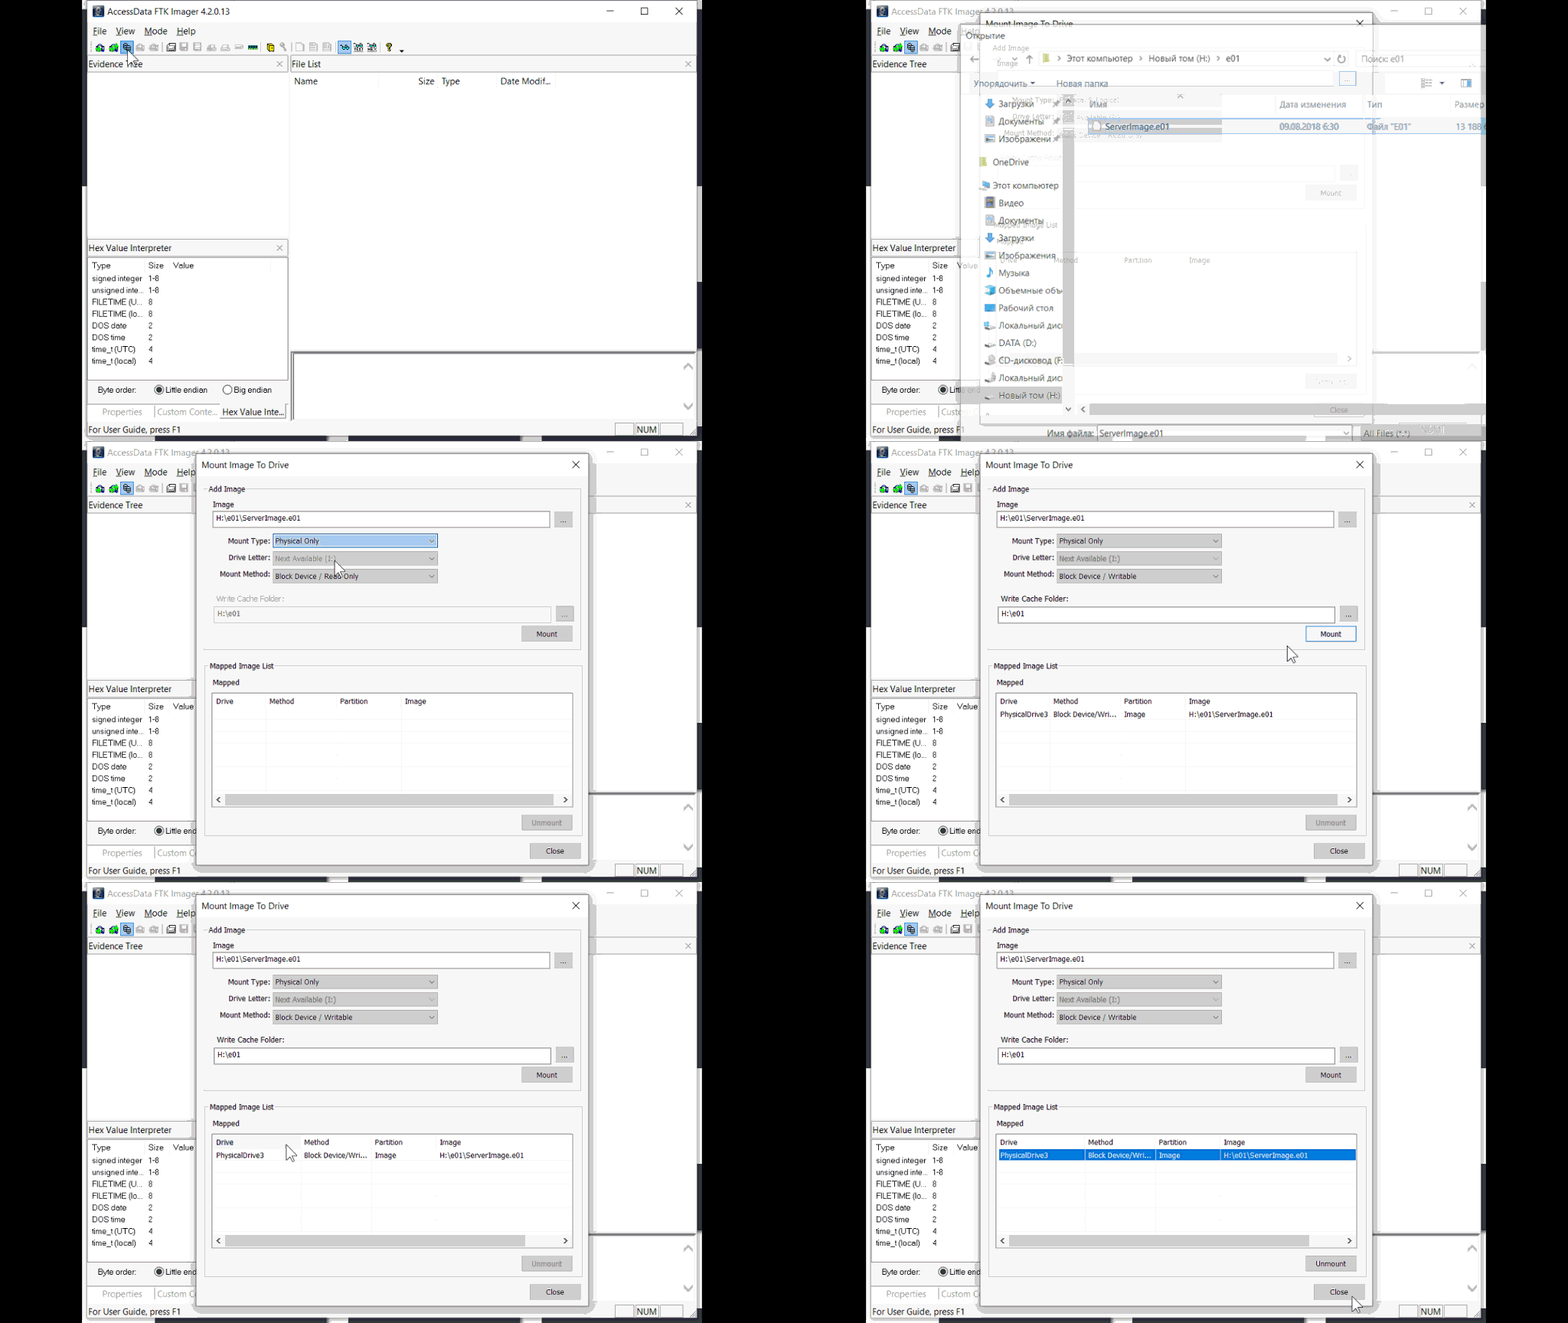
Notice a resulting device name. In this case it's a PhysicalDrive3
Open VMware Workstation and create a new VM, but don't create a virtual disk (or remove one if exist). You have to choose Use a Physical Disk in Virtual Machine Setting or add a new virtual disk as primary to the existing VM. You remember that our .e01 image is PhysicalDrive3 now

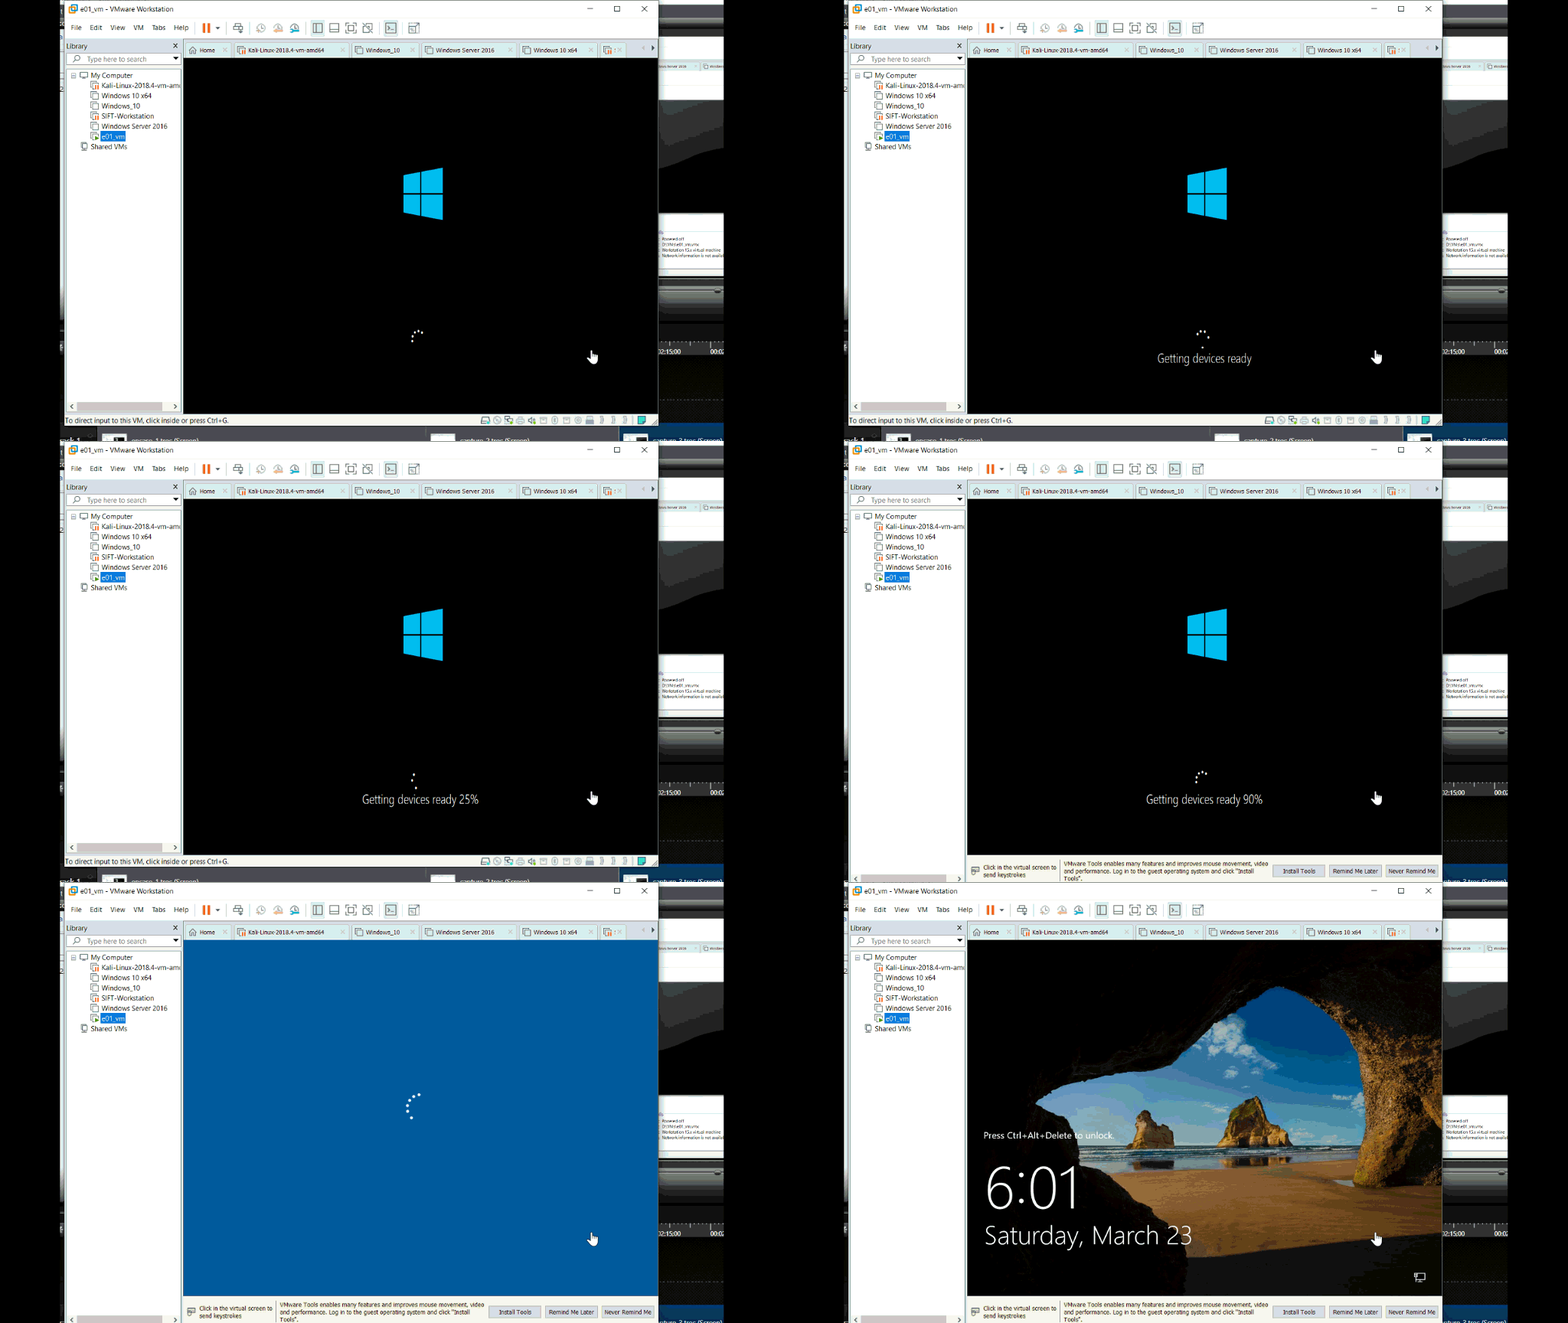
So, you just need to start a VM and watching some IT magic
Arsenal Image Mounter

Select Mount disk image and select the file you want to mount
I usually select Write temporary disk device

Note: This is useful to unlock physical image of Windows 10 by mounting the physical image in a Windows 10 environment.
Linux Part (SIFT)
The mostly typical tool using to attach .e01 images is ewfmount.py script. But there is a one hard limitation — this image being attached in Read-only mode. It's inappropriate for virtual machine. Therefore we'll use xmount command like:
The main features of xmount for us — it mounts the image in Read-Write mode and it can take a lot of image types on input. You can check for xmount syntax here.
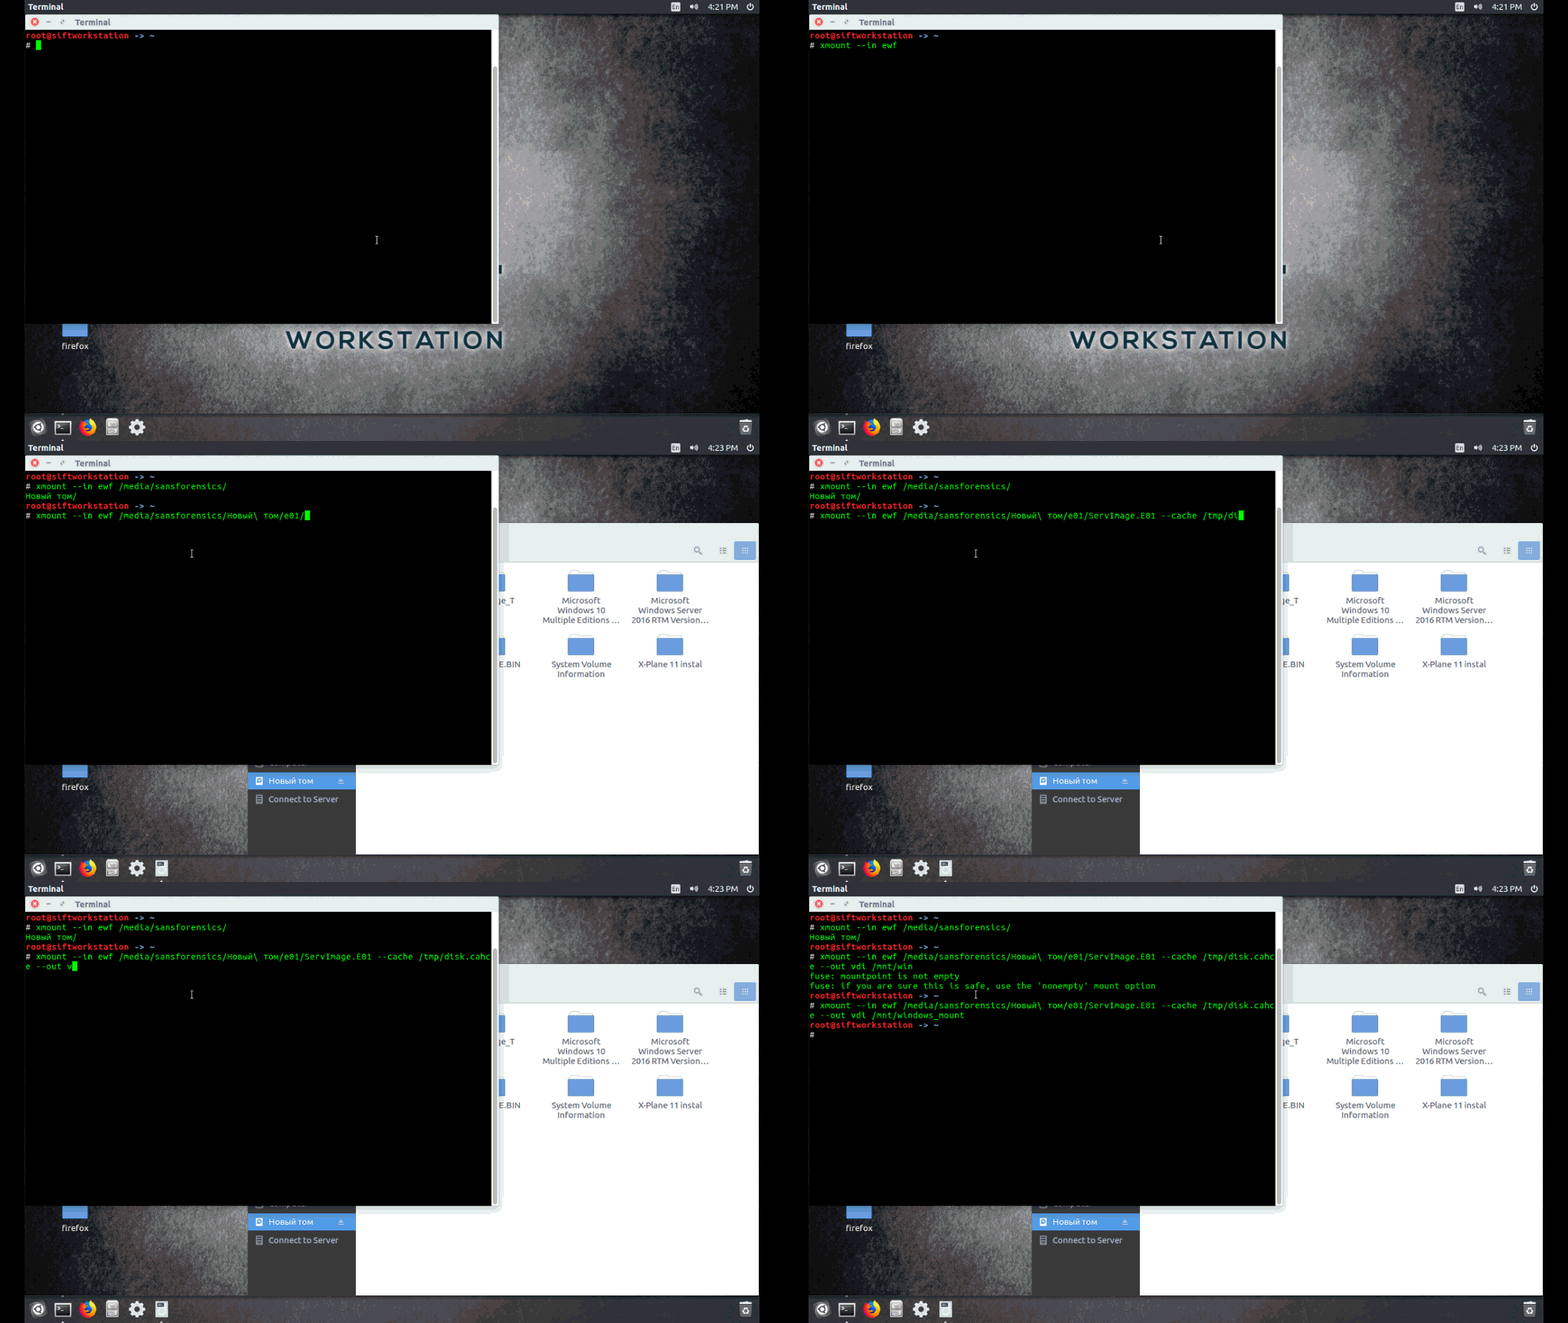
Ok, now we have a .vdi image in /mnt/windows_mount
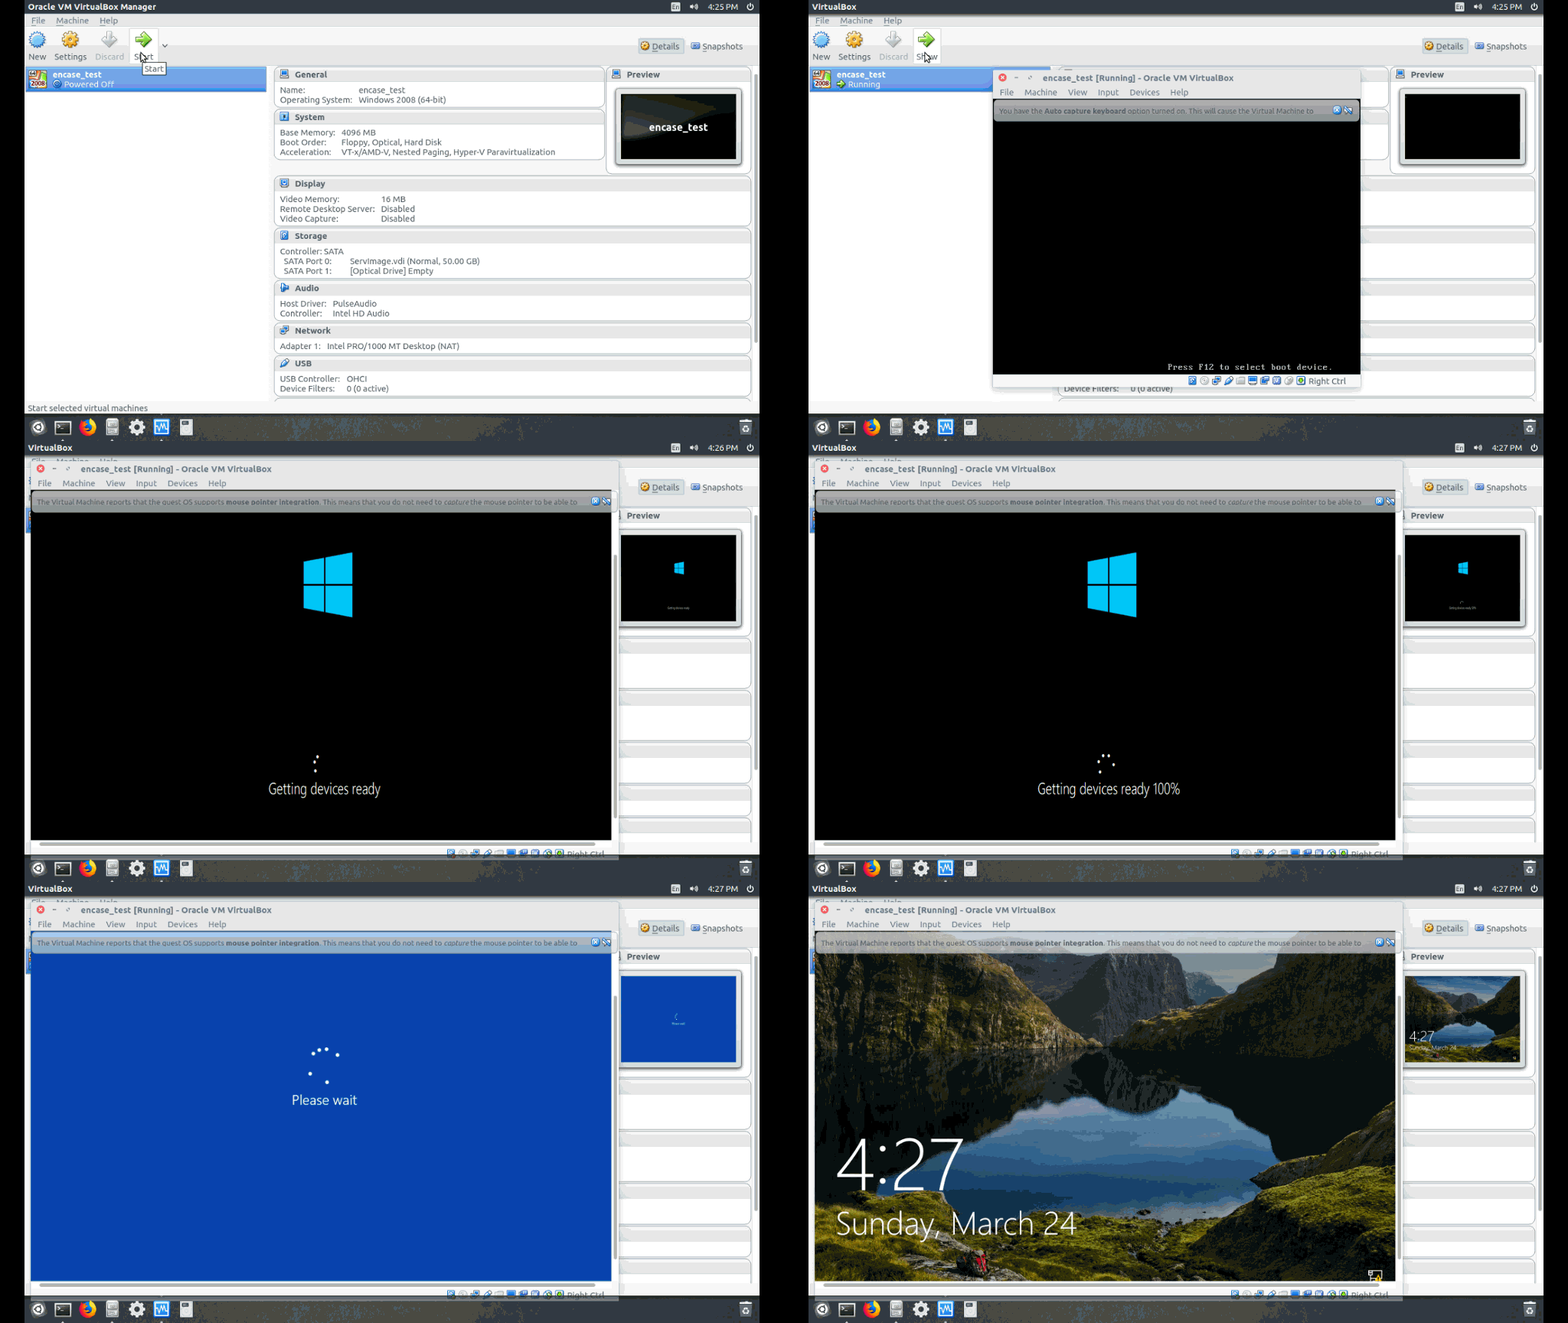
Let's open a VirtualBox and create a new VM with our .vdi image (choose existing disk) as a primary disk
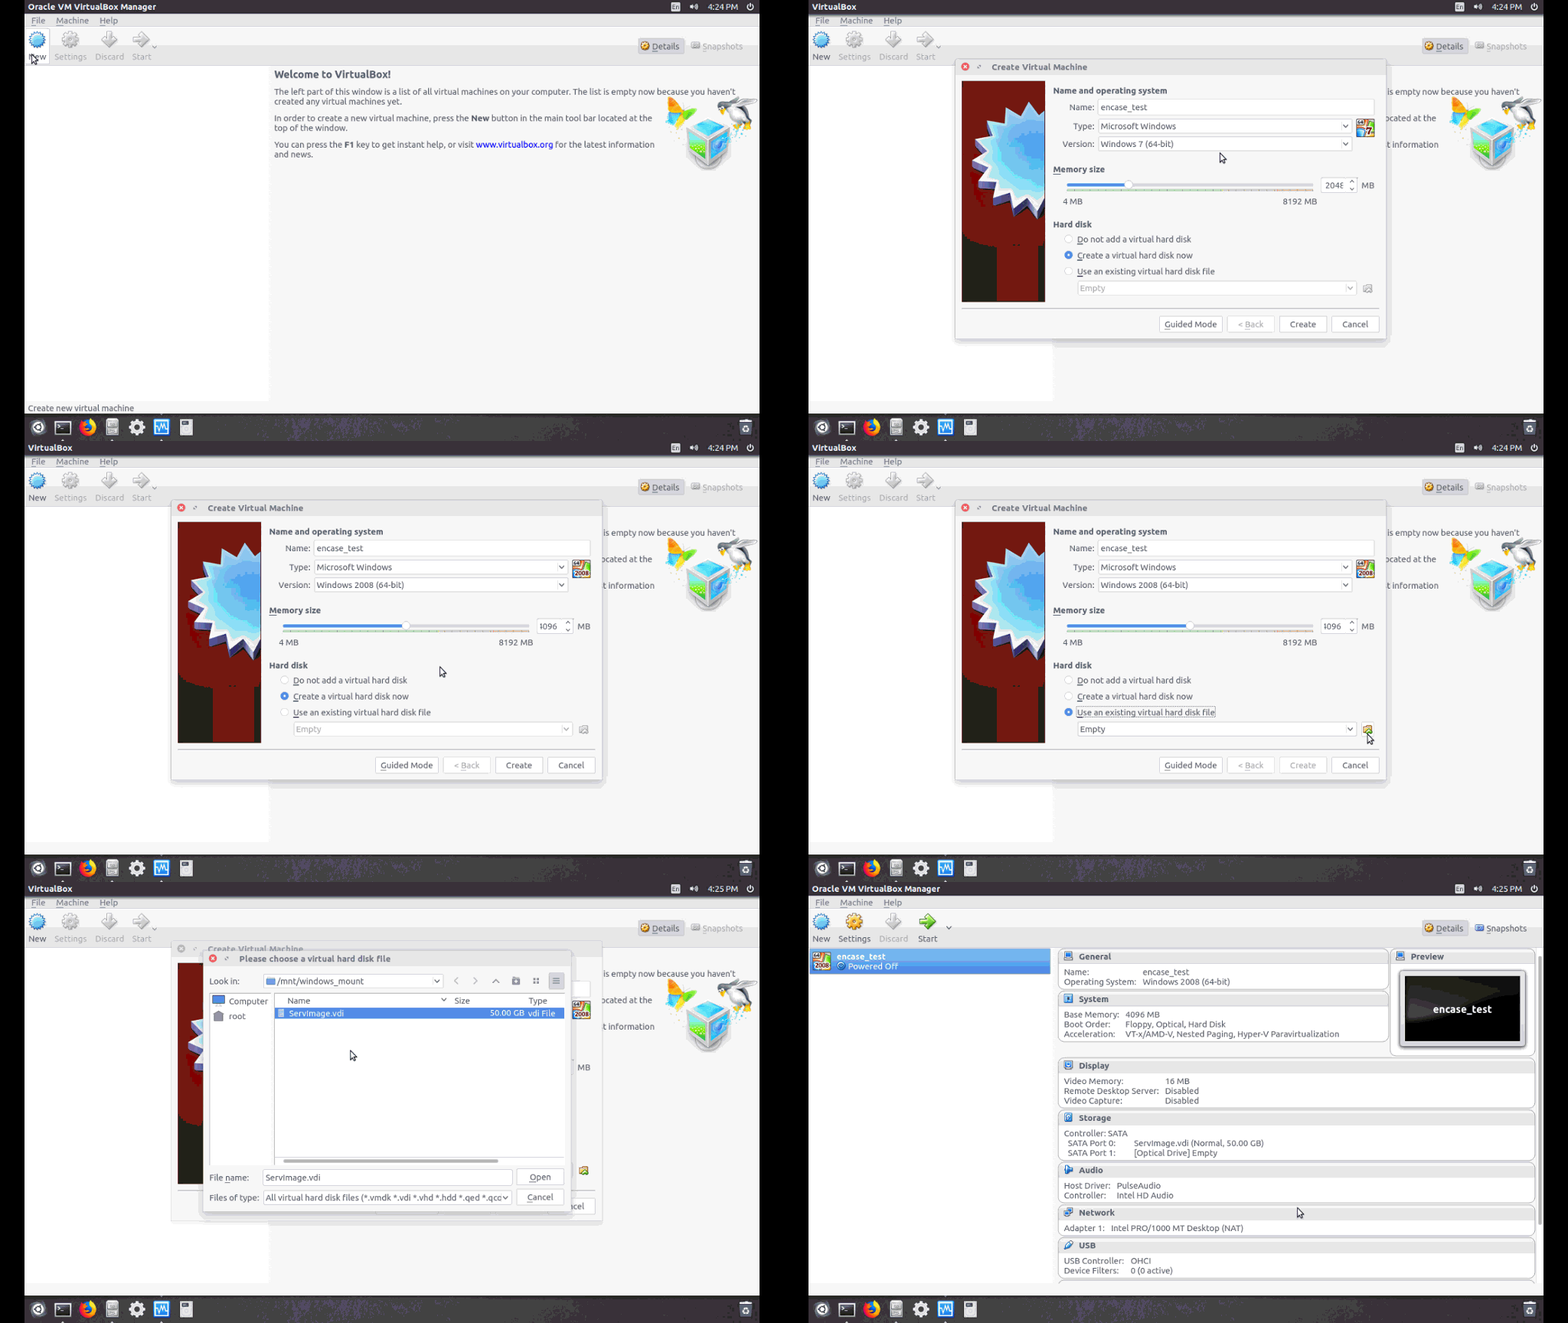
Finally just boot up the VM and enjoy!
Last updated
Was this helpful?